Ingredients:
*1 cup H20
*1/4 cup distilled white vinegar
*10 drops tea tree oil
*10 drops lavender oil
* spray bottle
Directions:
Simply add the water and vinegar into your spray bottle, followed by your oils. Close the spray bottle and shake vigorously and you're all set. But don't stop there. Experiment with your own oil blends to create your own personal concoction. I prefer using 2 oils for each batch (but no more than 3 oil blends so as not to confuse my senses too much). My favorites oil blends include lemon and either grapefruit, peppermint or basil.
[Recipe and Images via BLDG25]
Showing posts with label DIY. Show all posts
Friday, July 19, 2013
Thursday, June 20, 2013
DIY: 4th of July Denim Cuffs
Summer is officially upon us tomorrow, so I thought I'd share this awesome tutorial that is perfect for this time of year.
You'll need a pair of jeans, preferably in a boyfriend cut. Just make sure they aren't so tight that you can't cuff the bottoms. You'll also need an American flag or any fabric with the beloved stars and stripes (ie. t-shirt). Get your needle, thread and safety pins.
Turn your jeans inside out and secure the fabric from the bottom going up to the mid-calf area with safety pins. Sew and then remove the safety pins.
You can use this method for jazzing up your jeans with any pattern/colored fabric you choose. I love how there is stripes on one leg and stars on the other. It's up to you.
Enjoy your super patriotic jeans :)
[Images and tutorial via BDLG25.com]
Labels:
4th of July,
Americana,
Cool Finds,
DIY,
Fashion,
Spring,
Style,
Summer
Monday, June 3, 2013
Meatless Monday: Carrot and Ginger Juice Recipe
Perfect for Summer, this juice recipe is nutritious and delicious !
Ingredients:
* 1 bunch carrots
* 4 oranges (Navel, Blood, Valencia, etc.)
* 1 ginger root (about the size of your palm)
Directions:
Rinse the dirt off the carrots. Remove green tops. You can chop them to assist your juicer. There's no need to peel the carrots. Using a serrated knife, cut all of the rind off the oranges and separate to fit through the juicer. Break or cut apart the ginger. Run all of your ingredients through the juicer and mix. If you find the juice to be too spicy from the ginger, add another orange or water to dilute it.
Bon appetit!
Recipe and Images via BLDG25
Labels:
Diet,
DIY,
Eating In,
Food and Drink,
Health,
Meatless Monday,
Summer
Wednesday, February 6, 2013
DIY: Lavender Salt Scrub
Lavender is an amazing plant with many benefits. One of my favorite things to do with it is to make a salt scrub. There are many recipes, but this one happens to be my favorite. You'll need the following:
-18 oz. course sea salt
-18 oz. fine sea salt
-4 fl. oz. grapeseed oil (or other unscented body oil such as almond, avocado or vegetable glycerin)
-1/2 fl. oz. lavender essential oil
-dried lavender buds (available at our SHOP)
Combine and put into a 36 oz. container wide enough for you to easily scoop the goodness out :) This is a cheaper and more fun way to bring the spa into your own home.
Friday, February 1, 2013
Friday, January 25, 2013
DIY: Celestial Nails
I am over the moon (no pun intended) when it comes to this celestial nail art! Check out this and other great ideas on P.B.B.'s Pinterest page!
Tuesday, November 27, 2012
DIY Floral Lampshade
I found this cool DIY project on Pinterest and decided to give it a try. I used some pink tulle I already happened to have so it looks a little different from my inspiration, but I think it came out pretty good :) Click here for the full tutorial )
Monday, October 1, 2012
Friday, September 14, 2012
DIY: Yoga Mat Cleaner
This recipe for a yoga mat cleaner can be adjusted according to your preference. I love saving $$$ while at the same time customizing something to suit my own personal needs and wants :)
Friday, September 7, 2012
DIY: Cat Shoes
Aren't these shoes purrrrrfect??? I just love them! And the best part is I made them myself! They are super cute and inexpensive to make. I'm glad I bought an extra pair so I can make another design in the future :)
You'll need the following:
Inexpensive (black) flats - I got mine at Target for only $14.99
(White) embroidery thread
Sewing needle
White pencil - I used a makeup pencil
(Pink) acrylic paint - optional
Draw your simple sketch directly onto your shoe. You can use tracing paper but I opted to do it this way. Then start sewing.
I painted the nose pink to give it some added cuteness but it's completely up to you :)
Wednesday, September 5, 2012
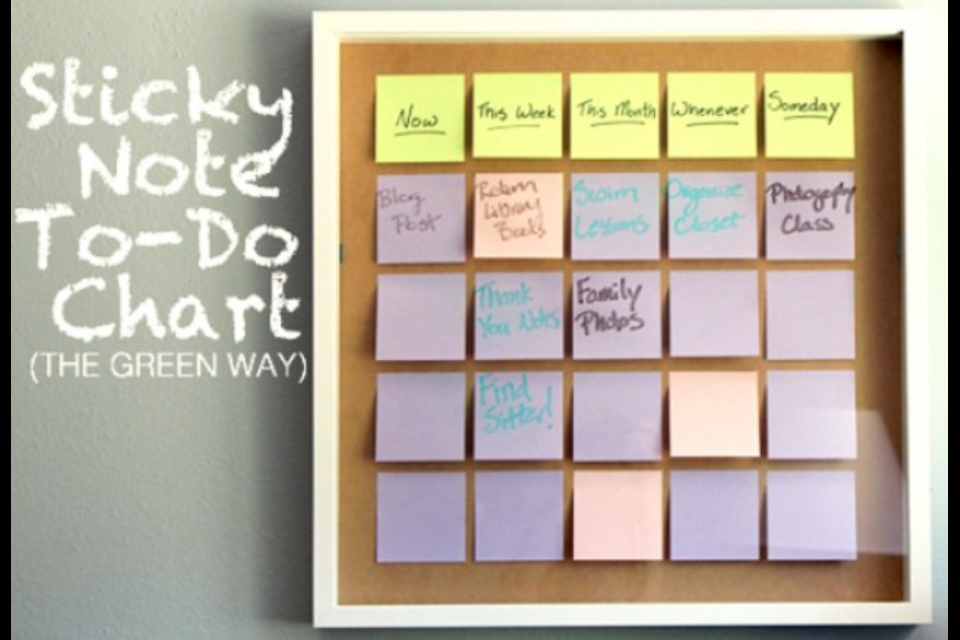
Cool Finds: Sticky Note To Do Chart
Sunday, August 26, 2012
DIY: Flower Pens
Aren't these flowers cute? The best part is they are functional, too! They are flower pens stored as a beautiful bouquet. Here's how you do it.
First, get your supplies:
*Faux flowers
*Stem Wrap Tape
*Pens
*Vase/bowl
*Scissors

Wednesday, August 15, 2012
DIY: Jewelry Redo
Don't be so quick to get rid of those older pieces of jewelry you never wear anymore! Here's a fun and easy way to revive those old pieces of jewelry with new life. Or take that impulse buy you have since lost interest in and make it into something you'll actually wear.
Take a look at some of my old items, although pretty, have become boring to me over the years never to be worn again. This "jewelry redo" took about the time it takes to paint my nails, and I can't WAIT to put these on! The secret... nailpolish!
Don't you just love those DIY projects you can do immediately? No need to go to the crafts store. Just grab some of that polish and get creative! I put 2-3 coats of super cheap ($0.99) white nailpolish as a base; allow to dry completely between coats. Then add color.
I happen to be a huge fan of the ombre trend and I also adore oceanic colors, so I went with both. I started in the middle with the in-between shade (turquoise). I then blended above and below with the lighter green (mint) on top, the darker blue at the bottom and blend, blend, BLEND. Using a cheap makeup sponge helps do the trick. It doesn't need to be perfect because no one will notice but you.
I'm so glad I was able to enjoy these pieces then, and can adore them even more now. I like the fact that the polish leaves such a shiny finish (and I didn't even use a top coat). I also can use the same shade(s) on my nails if I really want to coordinate. Best part is, I have the ability to take most pieces of jewelry (ie. very inexpensive) and customize them to what I like instead of limiting myself to what someone else created. Now my accessories evolve with my own style and without spending hardly a thing.
If you're like me, you have alot of polishes to choose from which makes this "jewelry redo" even more fun! The possibilities are virtually limitless.
This is also a good way to use up some of those old polishes you have lying around that you don't wear on your nails anymore.
I can't wait to get my hands on more of my old pieces :) Just make sure with the bigger earrings that you paint the back (either the same color/s or different ones)!
Friday, August 10, 2012
DIY: Recycled Containers
Do these look familiar? Well, if you shop at The Body Shop, they probably do. They are containers for their famous body butters! I finished these two off and thought they would be perfect for small clips and ponytail holders. Just peel off the labels (which come off very easily and without leaving glue residue behind) and give them a good wash. I am little obsessed with labeling things so I added that too, but you can leave them plain if you wish. If you have different colors, you can distinguish the contents that way. They are also great for stacking so you can keep the clutter factor at a minimum. Don't you just love to recycle? :)
Monday, August 6, 2012
DIY: Leafy Greens for Cats
This Martha Stewart DIY pet project looks like so much fun. I grow herbs for my own consumption. Why not for my cat?
[Via MarthaStewart.com]
[Via MarthaStewart.com]
Friday, June 29, 2012
DIY: Painted Knife Block
This is one of the easiest DIY projects that adds a beautiful pop of color to your kitchen countertop! I took some teal acrylic paint I happen to already have and created this. Simply remove your knives, wipe down the knife block with a damp washcloth, papertowel or rag. Allow to dry completely and paint! Give the paint enough time to dry before placing knives back in and enjoy!
Friday, June 15, 2012
DIY: "Born in the USA" Cut-Off Shorts
What you'll need:
![]() |
| *painter's tape * red stencil spray * white stencil spray * 2 foam brushes |
![]() |
| * star stencils * small piece of scrap cardboard |
![]() |
| * oh yeh! a pair of denim cut-off shorts ;) (I'm a huge fan of the light blue- especially for this look) |
Take your star stencil and place firmly against the shorts. Putting the scrap cardboard behind the first layer of the short will help you keep everything more secure. I prefer putting the stars on the right side of the zipper (the left side facing front) to more accurately mimic the American flag, but it's within your discretion. Spray the white stencil spray onto the stencil and touch up using one of your foam brushes.
Next, take the painter's tape and adhere it to the other side of the shorts to create the stripes. You can place them vertically or horizontally- it's up to you! In this DIY tutorial, the stripes run vertically, which is a fun twist on the traditional American flag.
Spray the red stencil paint onto the shorts over the tape. Don't worry if it's not perfect. The distressed/faded style just gives it a more vintage feel. You really can't go wrong. Again, you can touch up using your other foam brush to create just the look you're going for.
Remove the tape and allow to dry completely.
And you're all set! :)
There's nothing better than finding an inexpensive and fun way to create a trend that is retailing for $$$ right now. People won't believe you when you tell them you Did It Yourself ;)
Labels:
4th of July,
Americana,
Cool Finds,
DIY,
Spring,
Style,
Summer
Subscribe to:
Posts (Atom)